Views: 0 Author: Site Editor Publish Time: 2026-08-19 Origin: Site
Inaccurate fastener specification carries severe operational risks. When engineering teams miscalculate dimensions, the consequences extend far beyond a mismatched part. You face catastrophic joint failure, compromised leak-free seals in pressurized systems, and costly procurement returns due to incorrect thread pitches or lengths. A fraction of a millimeter deviation causes a fastener to bottom out in a blind hole or fail to achieve required clamping force, leading to immediate assembly line downtime.
Much of this confusion surrounds how to measure a socket bolt correctly. Industry-wide errors persist regarding head inclusion, thread pitch identification, and adherence to strict tolerances. Without a rigid measurement protocol, physical components fail to match engineering schematics.
Implementing a standardized, verifiable framework solves this problem. Quality control inspectors and procurement engineers can confidently match physical hardware to international standards, ensuring every component delivers the exact mechanical properties required for safe structural joints.
Length Measurement Protocol: For a standard socket bolt, length is strictly measured from directly beneath the head to the flat tip of the threaded shank; the head height is never included.
Precision Tooling is Mandatory: Accurate specification requires digital calipers (accurate down to 0.01 mm or 0.001 in) and dedicated thread pitch gauges. Steel rulers are only suitable for quick field checks on larger bolts, never for industrial procurement verification.
Standardization Compliance: Verifying dimensions against established frameworks, such as DIN 912 specifications, guarantees interchangeability, proper tool engagement, and load-bearing compliance.
Risk Mitigation: Standardizing the measurement workflow prevents the most common procurement error: confusing coarse and fine thread pitches, which leads to cross-threading and assembly downtime.
Accurate procurement begins with isolating and understanding the distinct geometric zones of the fastener. You cannot specify a component correctly if you do not understand how each physical feature interacts with the mating material and the applied load. Breaking the fastener down into its anatomical parts establishes a clear framework for quality assurance on the receiving dock.
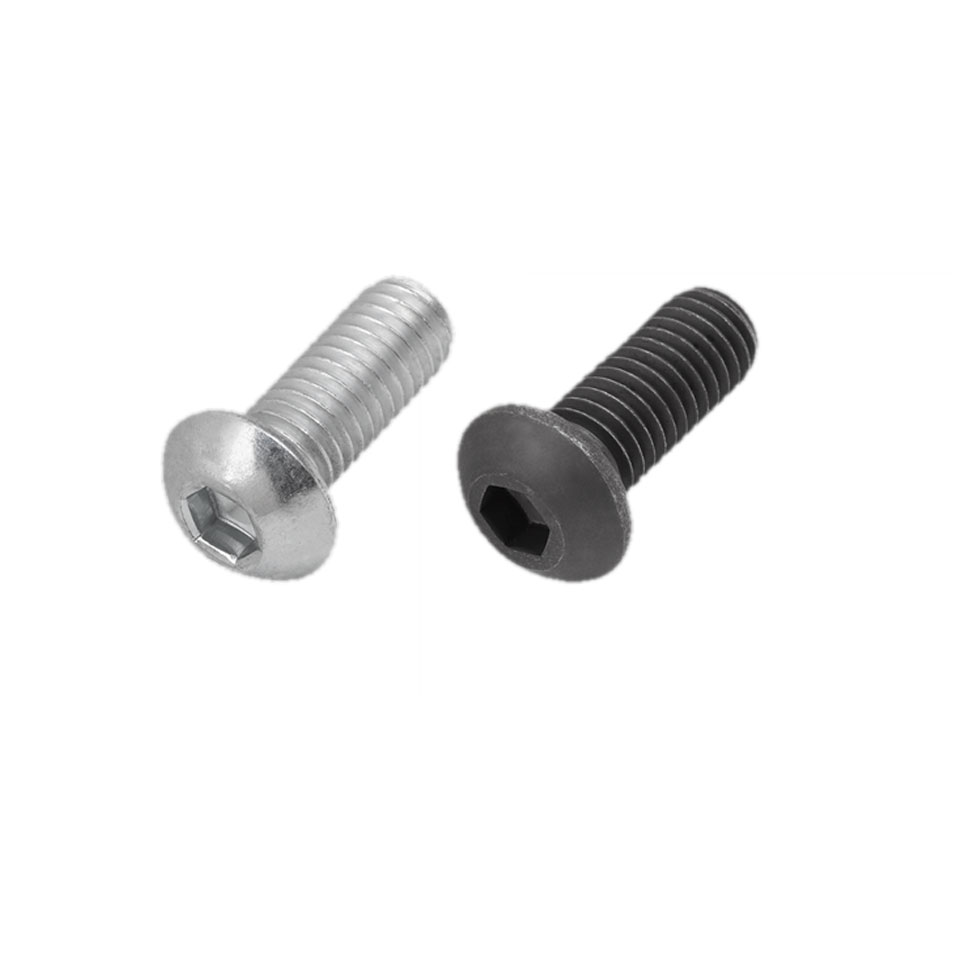
The head of the fastener serves as the primary bearing surface that transfers clamping force to the joint. You must measure the head diameter and head height independently. Head diameter dictates the required clearance in tight assemblies. Head height determines if the fastener will sit flush within a counterbored hole. If the head height exceeds the counterbore depth by even 0.5mm, the protruding metal can interfere with moving machinery parts or safety guards.
You must also measure the internal hex socket size, commonly known as the Allen drive. Measure the distance across the internal flats to verify key engagement depth and width. If the internal socket is manufactured out of tolerance, the hex key fits loosely. During high-torque applications, this loose fit causes the tool to strip the internal drive. Once stripped, the fastener becomes impossible to tighten or remove without destructive extraction methods like drilling or welding.
The cylindrical shaft of the fastener consists of two distinct sections: the unthreaded portion and the threaded portion. The unthreaded section is known as the grip length. You must distinguish between the grip length and the overall threaded length because they serve entirely different mechanical functions. The grip length absorbs shear forces across the joint interface.
When measuring this section, you evaluate the body diameter, which is the thickness of the unshanked portion. This measurement often differs slightly from the major thread diameter depending on the manufacturing method. In structural joints subjected to lateral loads, the grip length must span the shear plane. If the threaded portion intersects the shear plane, the reduced cross-sectional area of the threads creates a weak point. This significantly lowers the shear strength of the assembly and increases the risk of premature failure under dynamic loading.
Two frequently overlooked anatomical features are the underhead fillet radius and the tip chamfer. The underhead radius is the curved transition zone between the underside of the head and the cylindrical body. Manufacturers engineer this radius intentionally to eliminate sharp 90-degree corners. Sharp corners act as severe stress concentrators under dynamic loads, leading to snapped bolt heads.
Verifying the underhead radius ensures flush seating against mating surfaces. If the radius is larger than the chamfer of the mating hole, the fastener will not seat flat. This misalignment introduces bending stresses into the shank, leading to rapid fatigue failure. Similarly, you must verify the tip chamfer—the slight bevel at the very end of the threaded section. A proper chamfer acts as a lead-in guide. It allows the external threads to engage smoothly with internal tapped holes without cross-threading.
The threads themselves require precise evaluation. The major diameter is the absolute widest point of the threaded section, measured from the outside thread peak on one side to the outside thread peak on the opposite side. This dimension dictates the nominal size of the fastener.
Thread pitch defines the spacing of the threads. In metric systems, thread pitch is the exact linear distance between two adjacent thread peaks, measured in millimeters. In imperial systems, it is calculated as threads per inch (TPI). Confusing these two measurement systems guarantees assembly failure. Accurate measurement here dictates whether the fastener will successfully mate with its corresponding nut or tapped housing.
Evaluating a standard fastener requires separating the instruments used for strict quality assurance validation from those used for rough field estimates. Relying on inadequate tooling directly leads to specification errors, mismatched components, and compromised structural integrity.
Digital calipers are the foundational tool for fastener measurement. They provide versatile, rapid measurement capabilities for overall length, head diameter, body diameter, and major diameter. A high-quality digital caliper provides accuracy down to 0.01 mm or 0.001 inches. The external jaws handle outer diameters and lengths, while the internal jaws precisely measure the internal hex drive size. For the vast majority of industrial procurement and incoming quality control, calibrated digital calipers provide the exact resolution needed.
Micrometers represent the next tier of precision. They are the necessary tool for highly precise major and minor diameter verification in aerospace, heavy machinery, or high-pressure fluid applications. A micrometer eliminates the slight flex that can occur in caliper jaws, offering superior repeatability when tolerances are exceptionally tight. If your assembly requires an interference fit or operates under extreme cyclic loading, micrometers ensure the body diameter meets exact engineering specifications. You can also use micrometers in conjunction with thread measuring wires to calculate the exact pitch diameter, a metric that calipers cannot accurately capture.
Visual estimation of thread spacing is a guaranteed path to procurement failure. You must use a specialized thread pitch gauge to lock into the thread profile. A thread pitch gauge consists of multiple folding metal leaves, each stamped with a specific metric pitch or imperial TPI. By pressing these leaves against the threads, you eliminate the guesswork of visual counting.
When you find the correct leaf, it meshes perfectly with the fastener's threads, leaving no gaps for light to pass through. This tool is non-negotiable for distinguishing between standard coarse threads and fine threads. Fine and coarse threads often look identical to the naked eye but will immediately bind and gall if mismatched during installation.
Tape measures and steel rulers have a place in heavy construction framing, but they lack the resolution required for specifying industrial fasteners. They are useful for quick length checks on large-scale assemblies in the field or for sorting mixed bins of bulk hardware. A steel ruler cannot accurately measure a major diameter to the nearest tenth of a millimeter. It cannot reliably verify an underhead radius. Never use these tools for procurement verification or quality assurance documentation.
When receiving bulk shipments, measuring every single unit with calipers is inefficient. Go/no-go ring gauges become essential here. These gauges are precision-machined rings internally threaded to strict tolerance limits. You use them to batch-test incoming orders for thread tolerance compliance, such as verifying a 6g metric thread class.
The "go" gauge must thread completely onto the fastener without excessive force, proving the major diameter is not too large. The "no-go" gauge should only engage by one or two turns before stopping, proving the pitch diameter is not too small. Integrating ring gauges into your receiving workflow allows QA teams to rapidly accept or reject shipments before defective hardware integrates into your inventory.
Measurement Tool | Primary Application | Typical Resolution | Field Suitability |
|---|---|---|---|
Digital Caliper | Length, Major Diameter, Head Size | 0.01 mm / 0.001 in | High - Standard QA |
Outside Micrometer | Body Diameter, Pitch Diameter (with wires) | 0.001 mm / 0.0001 in | High - Aerospace/Precision |
Thread Pitch Gauge | Thread Spacing Verification | Exact Pitch Match | High - Mandatory for all QA |
Go/No-Go Ring Gauge | Batch Tolerance Testing | Class of Fit (e.g., 6g) | High - Bulk Receiving |
Steel Ruler | Rough Sorting | 1.0 mm / 0.0625 in | Low - Do not use for spec |
Extracting data to match supplier catalogs requires an exact, repeatable workflow. Inconsistent measurement techniques yield inconsistent data, leading to incorrect orders. Follow this strict protocol to ensure every dimension is captured accurately.
Determine Nominal Thread Diameter: Zero your digital calipers. Ensure the jaws are clean and free of debris. Open the main external jaws and place them across the widest part of the external threads. Rotate the fastener slightly while closing the jaws to ensure you measure across the absolute peaks of the major diameter. Record this number. Because threads are often rolled rather than cut, the major diameter might be slightly smaller than the nominal size. Round this measurement to the nearest standard metric or imperial size. A caliper reading of 5.85mm indicates a nominal M6 bolt.
Measure the Body Diameter: Move the caliper jaws to the unthreaded grip length. Measure the thickness of the smooth shank. Compare this to the major diameter to determine if the fastener has a reduced shank or a full-size body.
Calculate Thread Pitch: Select your thread pitch gauge. Press the toothed edge of a gauge leaf against the threaded section of the fastener. Hold the assembly up to a light source. If you see light shining through the gaps between the gauge teeth and the fastener threads, the pitch is incorrect. Continue testing different leaves until you find the one that achieves a perfectly flush fit. Read the number stamped on that specific leaf.
Measure Overall Length: For a socket head bolt, apply the "under the head" rule. Open the caliper jaws. Place the fixed jaw flat against the underside of the head, ensuring it rests squarely on the bearing surface, not on the underhead radius. Extend the sliding jaw down to the blunt end of the threaded shank. Read the measurement. You are measuring strictly the length of the shaft that will enter the mating material.
Measure Head Dimensions and Drive Size: Use the external jaws to measure the outer diameter of the head. Use the depth rod or external jaws to measure the head height from the flat top to the flat bearing surface. Finally, insert the internal measuring jaws into the hex socket. Measure the distance across the internal flats to determine the required Allen key size.
Industrial procurement relies on authoritative frameworks to ensure consistency across global supply chains. For metric socket cap screws, DIN 912 (also recognized internationally as ISO 4762) serves as the primary evaluation lens. Utilizing this standard eliminates ambiguity between manufacturers and end-users.
Adherence to the DIN 912 standard guarantees specific mechanical and dimensional properties essential for reliable mechanical fastening. When a supplier certifies a component to this standard, they verify its tensile strength, material grade, and precise dimensional tolerances. This framework ensures that a fastener purchased in Europe will perfectly match a tapped hole machined in North America.
Without this standardization, you risk purchasing hardware made from inferior steel grades or manufactured with loose thread tolerances. DIN 912 dictates the exact geometry of the head, the depth of the hex socket, and the transition angles of the underhead radius. This strict adherence allows engineers to calculate load distributions and torque specifications with absolute confidence.
Once you extract the raw data from your physical measurements, you must verify it against a standardized DIN 912 size table. This cross-referencing process confirms that the physical part meets the intended engineering design.
You must confirm that the body diameter, head diameter, head height, chamfer measurements, and key engagement tolerances fall within the acceptable limits published in the standard. If your caliper shows a head diameter of 13.5mm for an M8 fastener, the table will confirm if this falls within the acceptable upper and lower limits.
Nominal Size (Thread) | Thread Pitch (Coarse) | Head Diameter (Max mm) | Head Height (Max mm) | Internal Hex Size (mm) |
|---|---|---|---|---|
M3 | 0.50 | 5.68 | 3.00 | 2.5 |
M4 | 0.70 | 7.22 | 4.00 | 3.0 |
M5 | 0.80 | 8.72 | 5.00 | 4.0 |
M6 | 1.00 | 10.22 | 6.00 | 5.0 |
M8 | 1.25 | 13.27 | 8.00 | 6.0 |
M10 | 1.50 | 16.27 | 10.00 | 8.0 |
M12 | 1.75 | 18.27 | 12.00 | 10.0 |
M16 | 2.00 | 24.33 | 16.00 | 14.0 |
When a bulk shipment of a DIN 912 socket head bolt order arrives, QA teams must execute a structured sampling plan. You cannot measure every piece in a 10,000-unit order. Use statistical process control to sample a representative batch.
Measure the critical dimensions of the sampled batch against the DIN 912 tables using calibrated digital calipers and go/no-go gauges. If the sampled components fall within the specified tolerances for head geometry, thread pitch, and overall length, the QA team can authorize inventory integration. If the sample fails, quarantine the entire batch to prevent defective hardware from reaching the assembly floor.
Even with high-quality tools, the measurement process frequently breaks down due to human error and procedural oversight. Identifying these implementation risks allows you to build safeguards into your quality control workflows.
The most pervasive error in fastener specification is measuring the entire component from top to bottom. When personnel include the head height in the length measurement of a socket cap screw, they inadvertently order hardware that is too short for the application.
The shortened shank fails to engage locking nuts fully, leaving insufficient threads to hold the joint under tension. If the error happens in reverse, oversized bolts bottom out in blind tapped holes before the head makes contact with the mating surface, resulting in zero clamping force. Install visual training guides at all QA stations, heavily emphasizing the "under the head" baseline for all non-countersunk hardware.
Relying on visual estimation to determine thread pitch is a high-risk practice. Fine threads and coarse threads of the same major diameter look remarkably similar to the untrained eye, especially in smaller metric sizes.
The consequence of misidentifying thread pitch is immediate assembly failure. Forcing a coarse thread into a fine-tapped hole causes severe galling, strips the internal threads of the housing, and results in scrapped assemblies. This is especially destructive when working with stainless steel hardware, which cold-welds instantly when cross-threaded. Enforce mandatory dual-verification protocols. Technicians must use both digital calipers for the major diameter and dedicated thread pitch gauges for the spacing.
Focusing solely on thread size and length leads engineers to ignore the geometry of the head and the underhead radius. This oversight creates significant mechanical interference issues during final assembly.
If the head height is not verified against the counterbore depth, the fastener protrudes above the surface, interfering with moving machinery parts. If the underhead radius is larger than the chamfer of the drilled hole, the fastener fails to seat flush, creating uneven stress distribution. Include strict counterbore depth and chamfer checks alongside fastener head height measurements during the initial prototyping and QA phases.
Accurate measurement of a socket bolt is a rigid, standardized process that directly impacts structural integrity, leak prevention, and procurement efficiency. Guesswork and visual estimation have no place in industrial hardware specification. By isolating the anatomical features of the fastener, utilizing precision digital calipers and thread gauges, and adhering strictly to the "under the head" length rule, you eliminate the risks of cross-threading, joint failure, and costly assembly downtime.
Take the following actions to secure your procurement workflow:
Audit your current measurement tooling immediately and replace any worn steel rulers with calibrated digital calipers.
Download a comprehensive metric size tolerance chart and mount it directly at your incoming inspection stations.
Implement a mandatory go/no-go ring gauge testing protocol for all bulk fastener shipments before they enter active inventory.
Request specification-backed sample batches for your next engineering project to verify supplier tolerance compliance firsthand.
A: No. Measure strictly from the flat underside of the head to the tip of the threaded shank. Only countersunk or flat head bolts include the head in the overall length measurement.
A: Use a specialized thread pitch gauge. Press the toothed leaves of the gauge against the threads until one fits perfectly without any light showing through the gaps. Read the stamped number on that specific leaf.
A: While length and thread pitch are measured similarly (under the head), a socket head bolt requires measuring the internal hex drive size for the Allen key, whereas a hex cap screw requires measuring the external distance across the flats for a wrench or socket.
A: Measure the major thread diameter, body diameter, thread pitch, overall length, head diameter, head height, underhead radius, and hex socket size using digital calipers. Cross-reference these exact dimensions against a published DIN 912 or ISO 4762 tolerance table.
A: For industrial accuracy, you need digital calipers (accurate to 0.01 mm or 0.001 in) for diameter and length, a thread pitch gauge for thread spacing, and potentially a micrometer for high-tolerance applications. A steel ruler is only suitable for quick field checks.
A: Insert the internal measuring jaws of a digital caliper into the internal Allen head socket. Measure the distance across the internal flats (from one flat side directly across to the opposite flat side), ensuring you measure key engagement depth as well.